Frame Construction
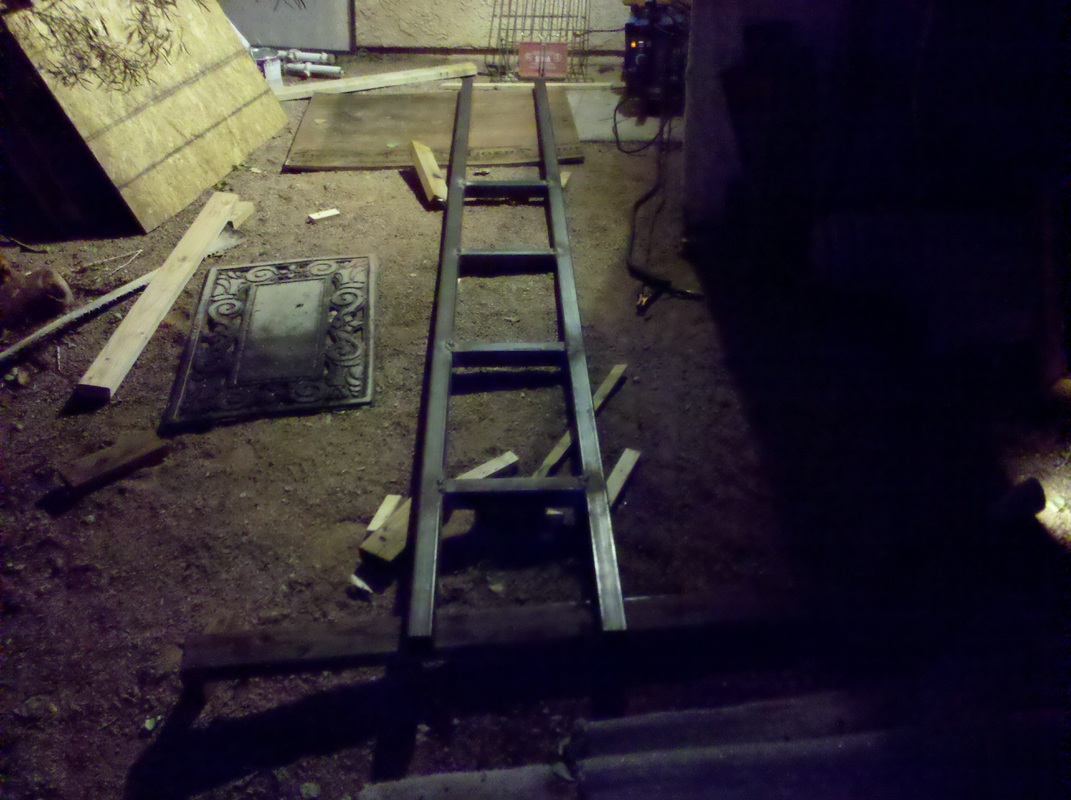
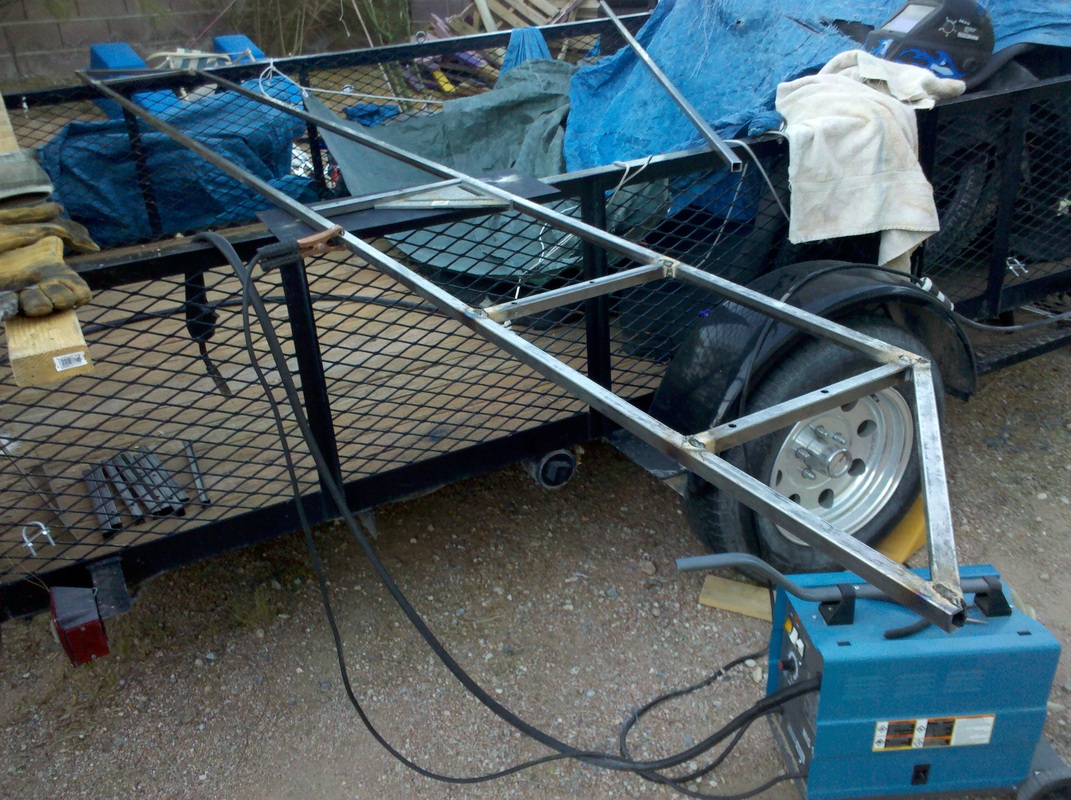
A night shot of a completed truss. As I mentioned, A friend of mine, Les, is an engineer, and did a truss calculation for me to assure that the materials were strong enough for the load. The bottom rail of the ladder truss is 2"x3/16" thick square tubing, the top rails are 2"x2"x1/8", and all the spanners are 2"x2"x1/8". I made sure all pieces were level and square. Some of the dimensions are on the sketch on the Design page. I made two identical trusses.
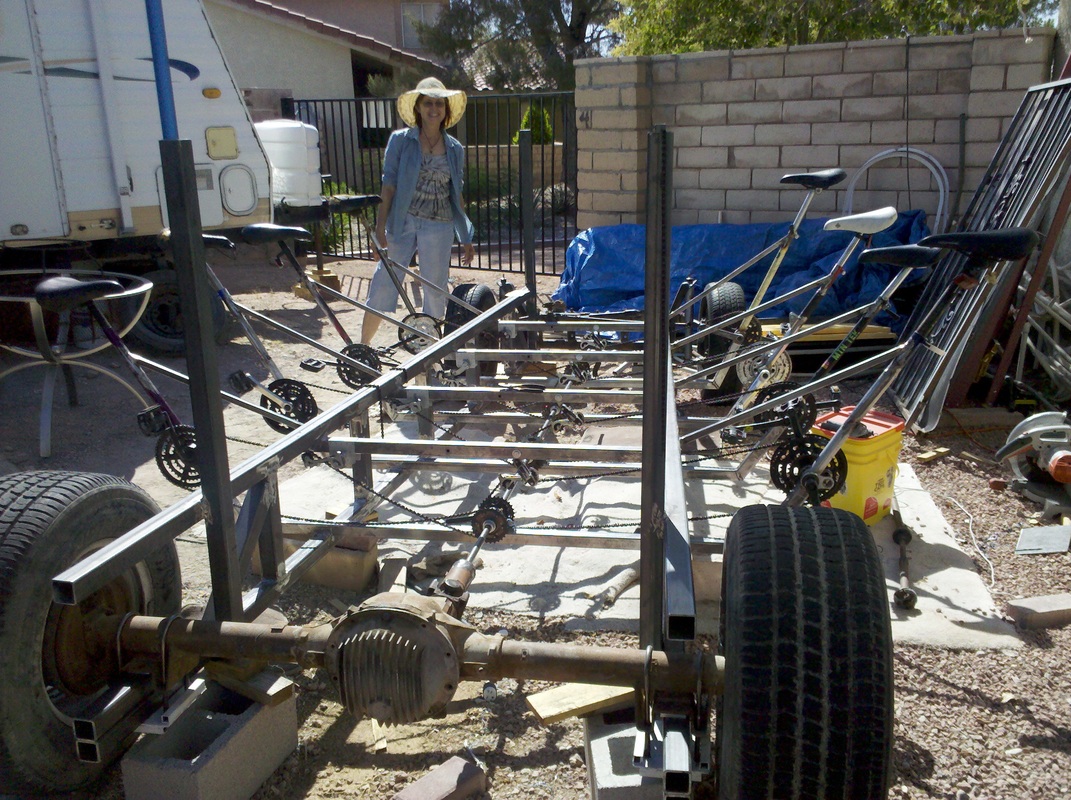
Initial frame setup
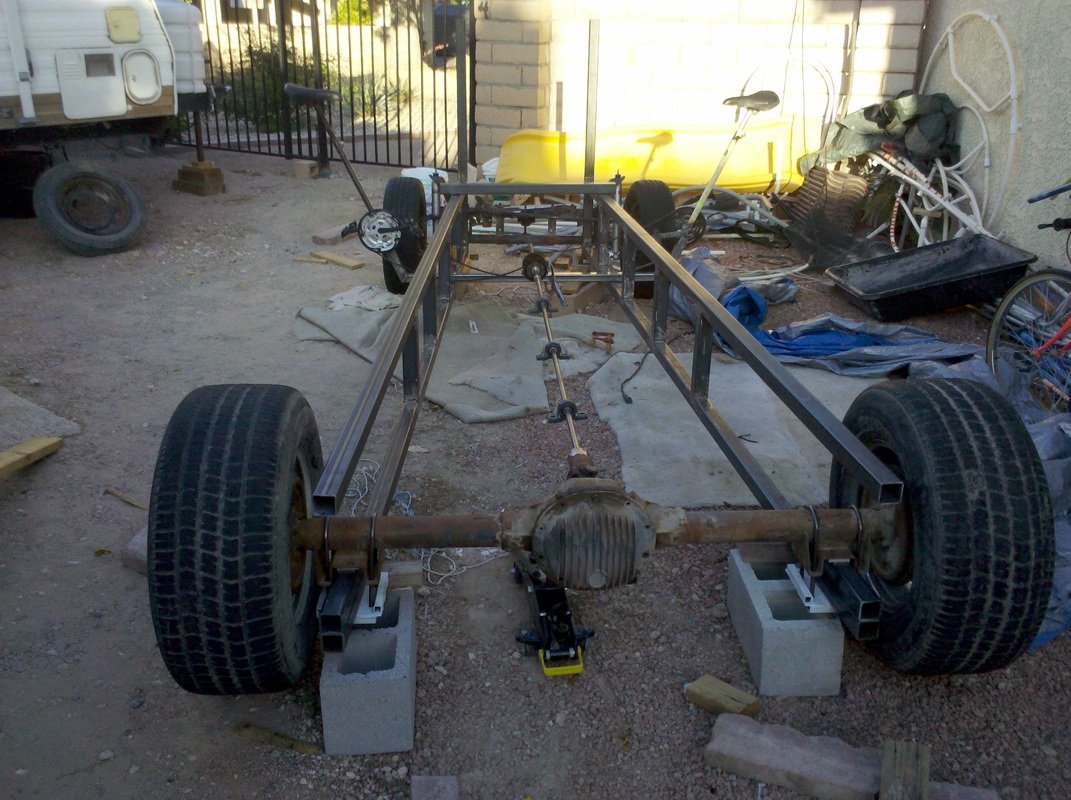
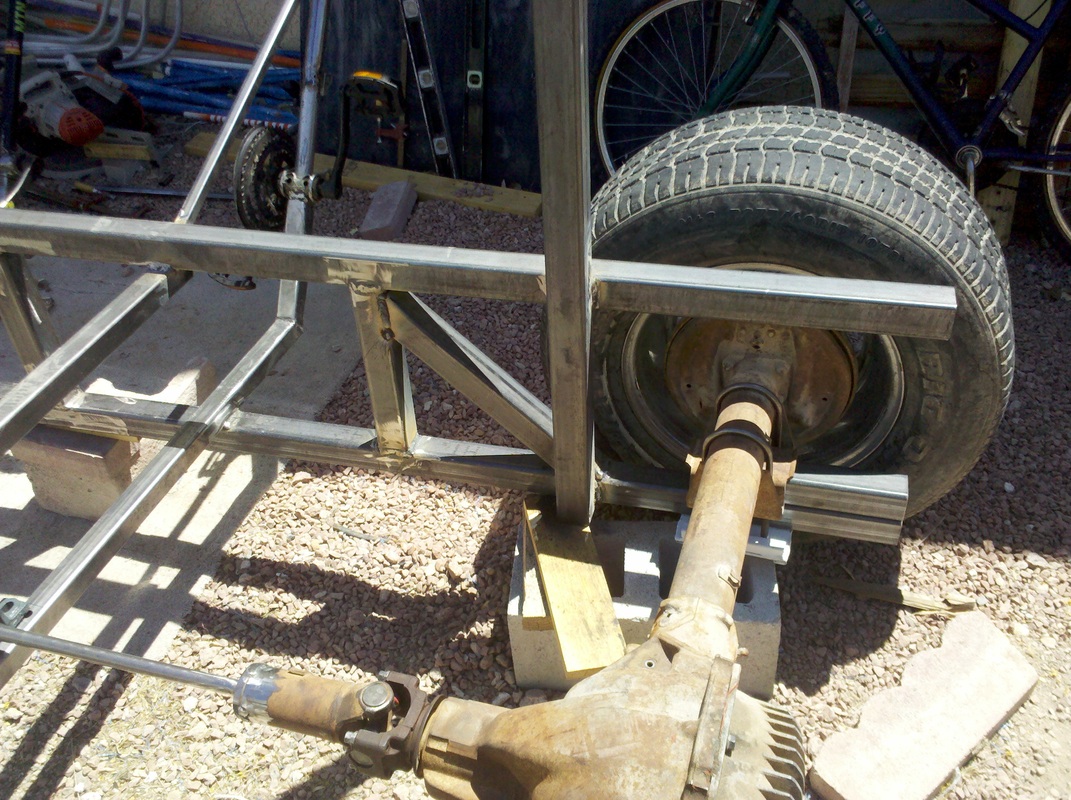
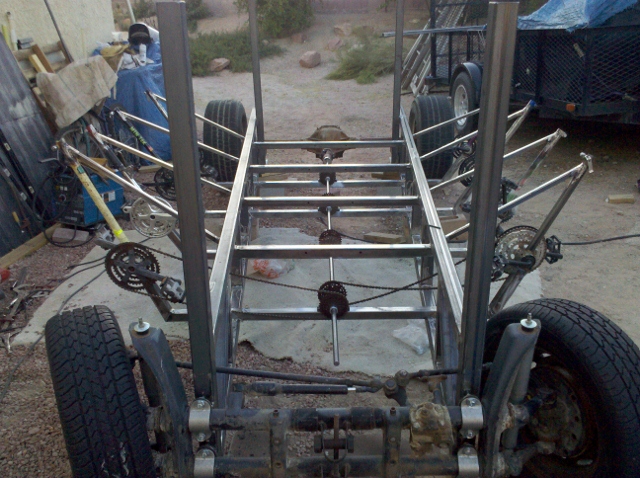
HooBoy! Getting somewhere now! Again, making sure everything is shimmed level and square, I welded on the front uprights to the trusses and clamped the rear axle to the truss via the car leaf spring bracket that was already on the Chevy Camaro axle. To lower the frame 2 inches I put an extra piece of 2" square stock between the truss and axle. I made the U bolt bracket from scrap. Those U bolts are standard bolts for car rear ends. I dropped in my bicycle seat crossmember and driveline to see how things lined up.
Rear Uprights and braces
We decided to add these diagonal braces for strength, front and back. Later I also weld on a short upright on the very back of each truss to complete the box frame for the rear axle.
Attaching the front end
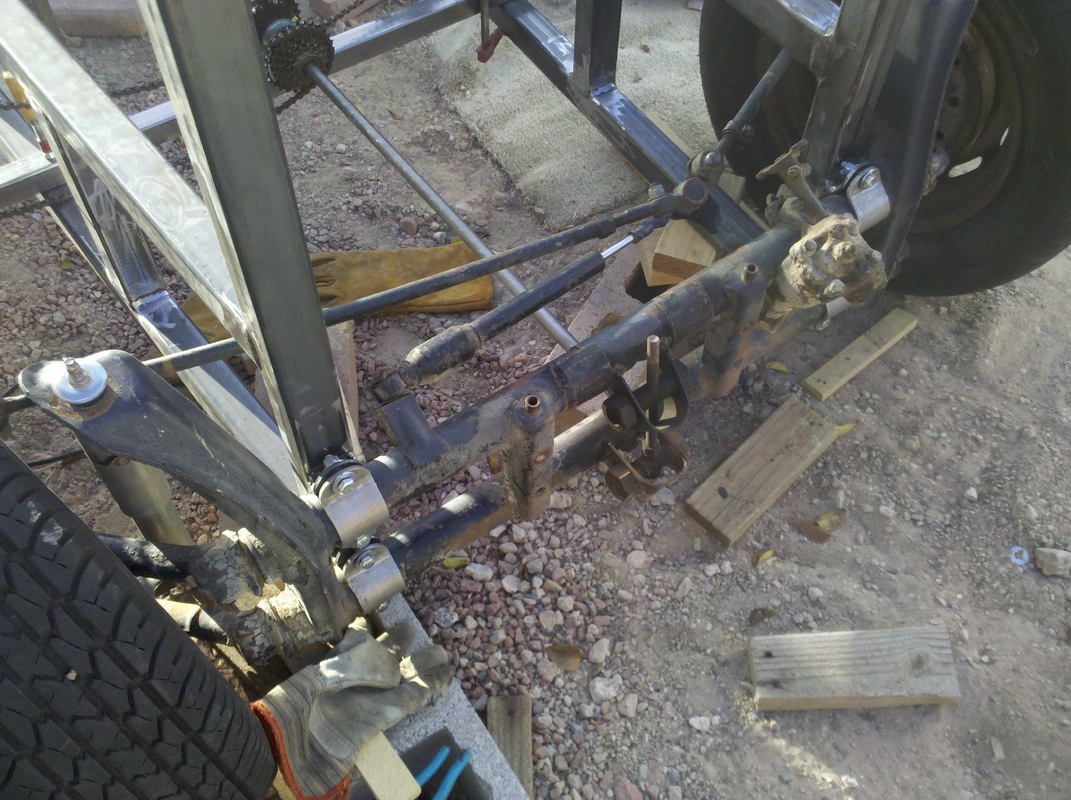
The VW front beam is made up of two horizontal tubes, one directly above the other. I used those beam clamps as seen in the photo to attach the front end. I got them from a dune buggy parts house (see my parts list under credits section).
Note that the steering box (that greasy dirt encrusted thing) and tie rods are already there.
Note that the steering box (that greasy dirt encrusted thing) and tie rods are already there.
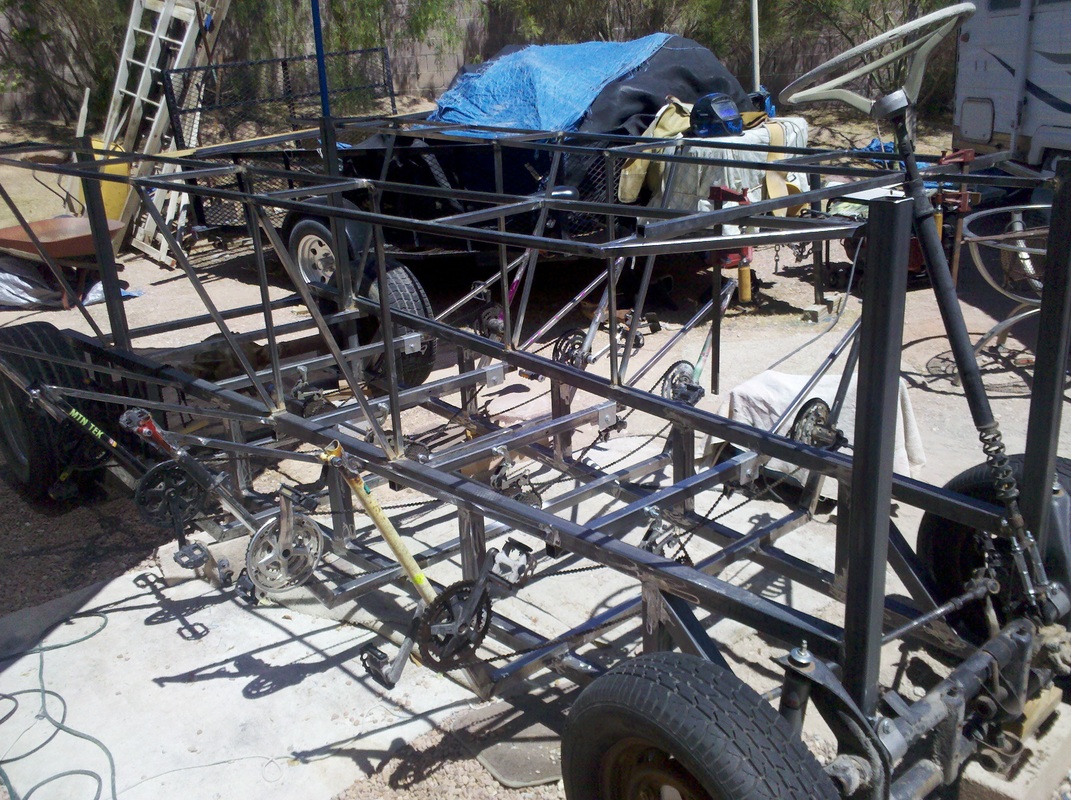
Crossmembers and seat posts
I then mounted the previously fabricated lower crossmembers/bicycle seat posts and upper crossmembers. Note the lower crossmembers are on top of the lower truss member. I felt this was important as it kept the drive train higher up into the chassis for ground clearance, and avoiding damage to the drive train while loading and unloading the bike (if necessary it could just slide on the rails (o:)
The upper cross members are welded to the bottom side of the upper truss rails so that I could drop the plywood flooring into the recess bounded by the upper truss rails.
Also added the 3/4" 16 ga. square tubing braces from the upper truss rail to just under the seat post for strength to secure the rider's seat.
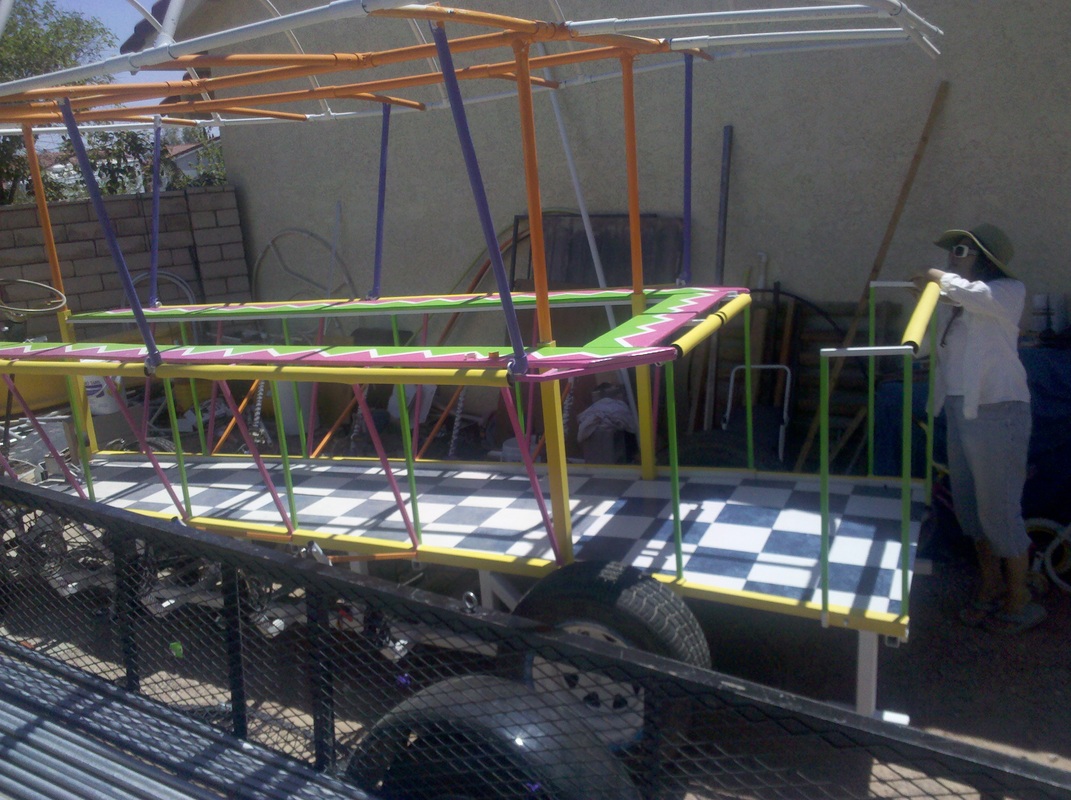
Bartop frames
After I had the lower frame done (pretty much (0:) I made the bar top frames. Note the predrilled holes to bolt on the wood top--much easier to do before assembly.
Another bartop photo

Welded on the bar tops to the uprights.
I Also added the 3/4" 16 ga. square tubing braces from the upper truss rail to both the inside and outside bar frame rails to form a "V" support. After all, if people can sit on them, they will (and they do (o:)
More frame pix at the bottom of this page.
I Also added the 3/4" 16 ga. square tubing braces from the upper truss rail to both the inside and outside bar frame rails to form a "V" support. After all, if people can sit on them, they will (and they do (o:)
More frame pix at the bottom of this page.
Adding a floor
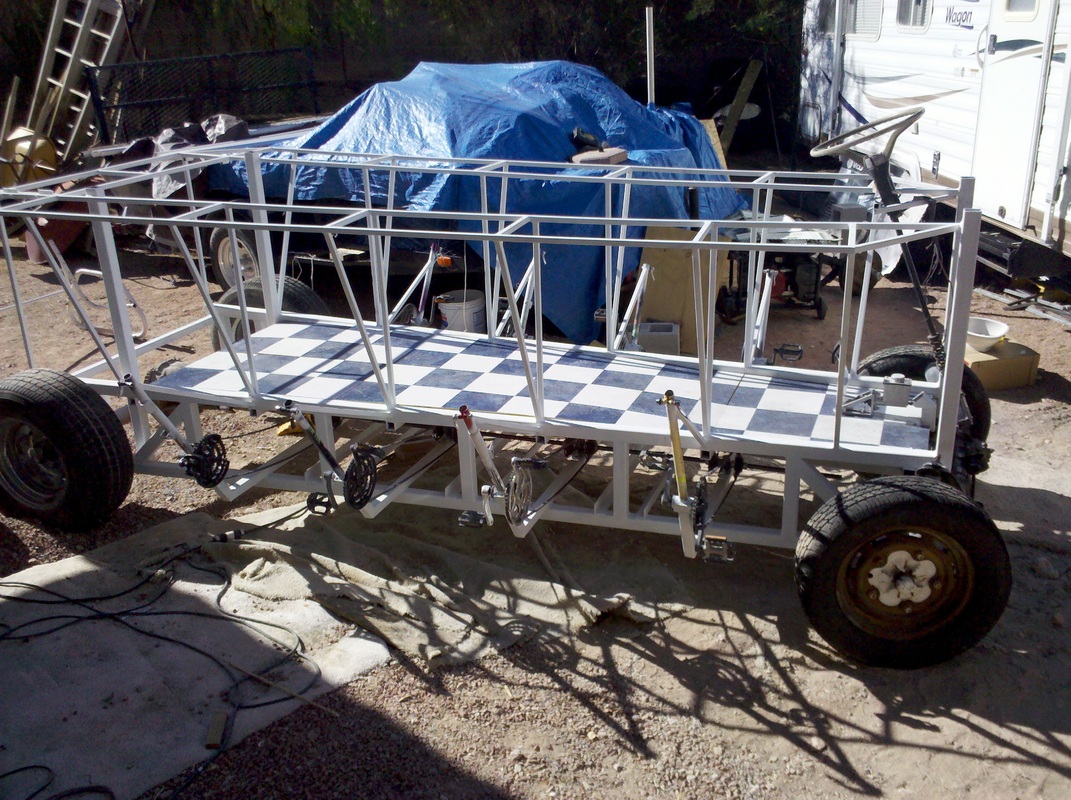
I got a sheet of 3/4" plywood, cut it in half, then cut each half to fit inside the trusses and dropped them in to make the floor. There's a single short front piece of plywood that they butt up against that supports the brake pedal.
Holly asked me what I was going to do with the floor and I said "I dunno. Prolly paint it." She said no way, and went and got a linoleum remnant and cut and glued it on. Looks great, no?
We also sprayed the metal with white Rustoleum primer to keep off the rust. Later, the whole gang went crazy and painted it wild colors.
If you click and enlarge this pic you can see below where i added extra angle iron cross members to hold the marine batteries and subwoofer for the sound system (or add a generator or electric motor?).
The balcony
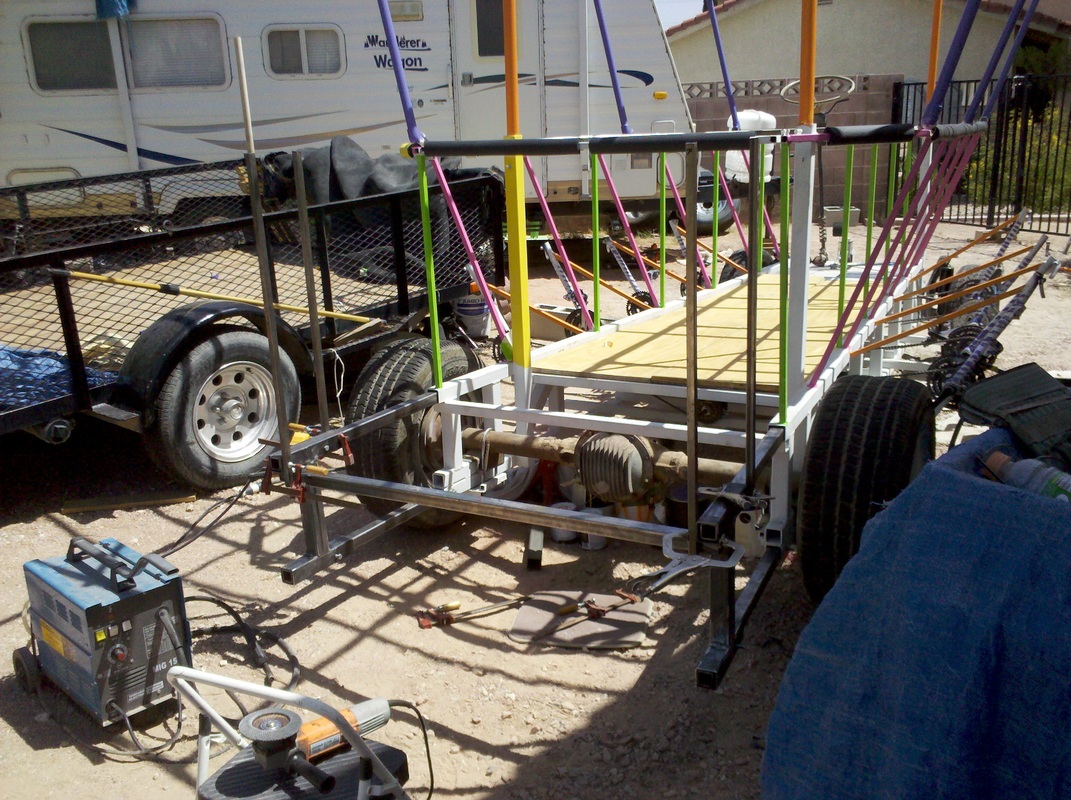
Okay, the reason the balcony wasn't included in the design section was because it didn't really get conceived until about 3 weeks before Burning Man. I had already designed and built the rest of the bike as a whole unit, including a convenient length -- overall about 14 feet. But it still lacked something in the rear.
It just ended.
So I real quick threw a railing frame together, cut 4 pieces of 1 3/4" square tubing (1/8" wall) about 4 feet long and slid them into the ends of the truss rail; top and bottom.
It just ended.
So I real quick threw a railing frame together, cut 4 pieces of 1 3/4" square tubing (1/8" wall) about 4 feet long and slid them into the ends of the truss rail; top and bottom.
And a balcony floor...
Holly putting on rubber pads
Then I slid the porch railing on to the rails sticking out. Drilled holes thru the telescoping pieces so I could bolt them together. I cut another piece of plywood floor & Holly covered it with linoleum. You can get onboard thru the opening in the railing. Now, usually when we move it, we take the back porch off. It worked out great. The other benefit to the removable rear deck is that we can make other kinds of add-ons. DJ booth? Articulating second car? Tank racks for flame effects?
Oh yeah; I also put a hinged bar top across the back so it could be raised to allow easy access to the bar and driver area, More finished pix below. The pub is packed away right now and my hand is in a cast, but if I get a chance, next time it's out maybe I'll take some better pix of the balcony parts.
Oh yeah; I also put a hinged bar top across the back so it could be raised to allow easy access to the bar and driver area, More finished pix below. The pub is packed away right now and my hand is in a cast, but if I get a chance, next time it's out maybe I'll take some better pix of the balcony parts.

Holly kicks back on the porch after a day of bike work
A first try with actual seats!
Getting the bar tops on. Still needing a few "V" supports for the bar top frames...

Time to primer. Cleaning up nicely...
